Pandas is a powerful Python library for data manipulation and analysis.
You can run Pandas on your computer using the following two methods:
- Run Pandas online
- Install Pandas on your computer
In this tutorial, you will learn both methods.
Run Pandas Online
To run Pandas code, you must install the Pandas library in your Python environment. For a quick start, you can use our online Python editor, which already includes support for Pandas.

The online editor allows you to run Python code with Pandas directly in your browser—no installation is required.
Install Pandas on Your Computer
For those who prefer to install Pandas on your computer, this guide will walk you through the installation process on Windows, macOS, or Linux (Ubuntu).
To use Pandas, you must install Python and Pandas on your system. Follow these steps to get started with Pandas on Windows:
- Install VS Code
- Download and Run the Python Installer File
- Install Python
- Install Pandas
- Verify the Installation
Here is a detailed explanation of each of the steps:
Step 1: Install VS Code
Go to the VS Code official website and download the Windows installer. Once the download is complete, run the installer and follow the installation process.
Click Finish to complete the installation process.
Step 2: Download and Run the Python Installer File
Go to the official Python website and download the latest version for Windows.
The website automatically detects your operating system and gives you the correct installer.
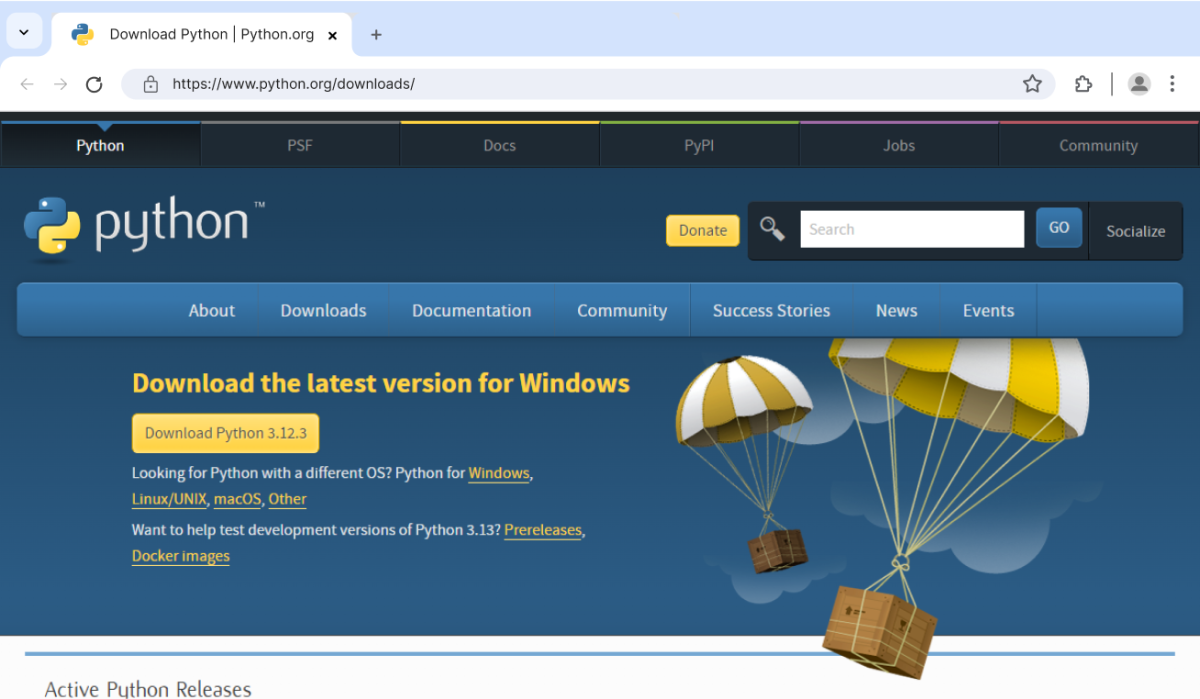
Once the download is complete, navigate to your download folder and run the installer. Depending on your security settings, you might be prompted to allow access.
Simply allow it and proceed.
Step 3: Install Python
Once you have run the installer, you will come across this screen.
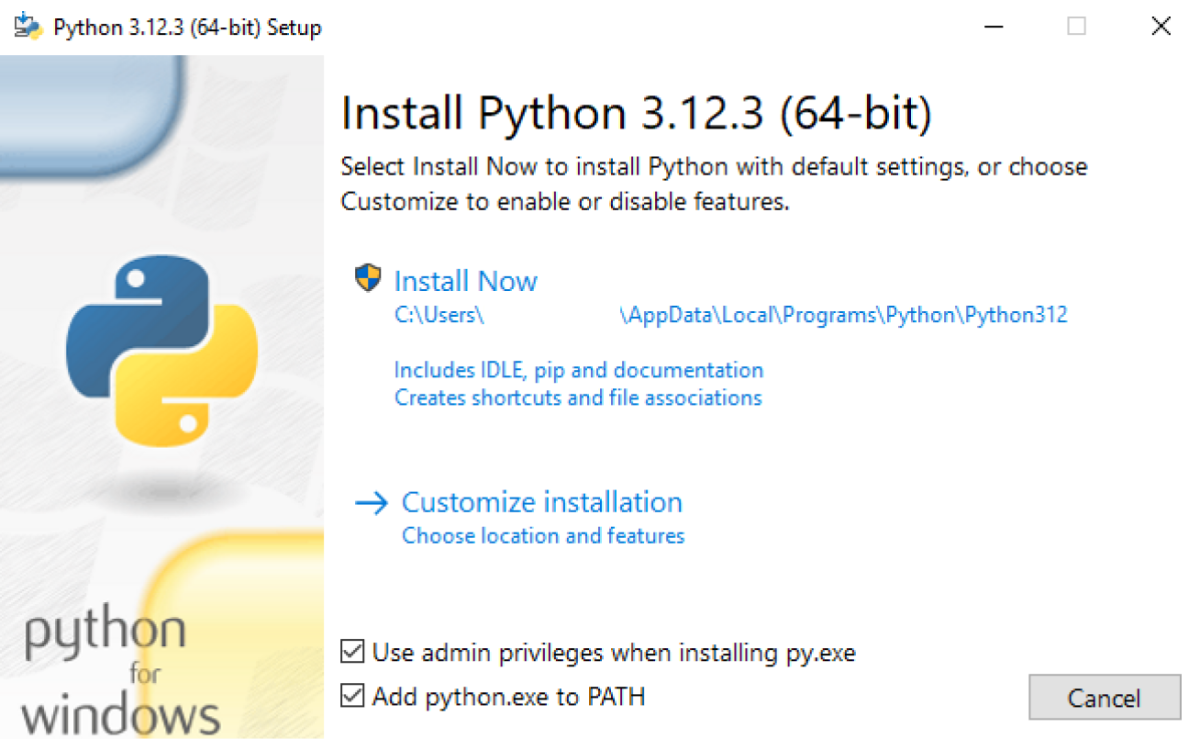
You will see two options on the screen: Install Now and Customize Installation. We suggest you skip all customization steps and simply click Install Now.
- Check on Add python.exe to PATH as it ensures Python is added to our system's PATH variable. (Recommended)
- Click Install Now, as it will include all the necessary files needed later.
This makes it easier to run a Python Program from the command prompt (cmd) directly without specifying the full path of the Python executable.
After using this option, Python will be successfully installed on your device.

You can verify whether Python is installed using the following command in the command prompt.
python --version
Note: The version number might differ from the one above, depending on your installed version.
Now that you have Python installed, you're ready to add any Python libraries you might want to work with. In the next step, we'll install the Pandas library.
Step 4: Install Pandas
Open VS Code, then open a new terminal (use
Ctrl + `
for keyboard shortcut).
In the terminal, type the following command to install Pandas:
pip install pandas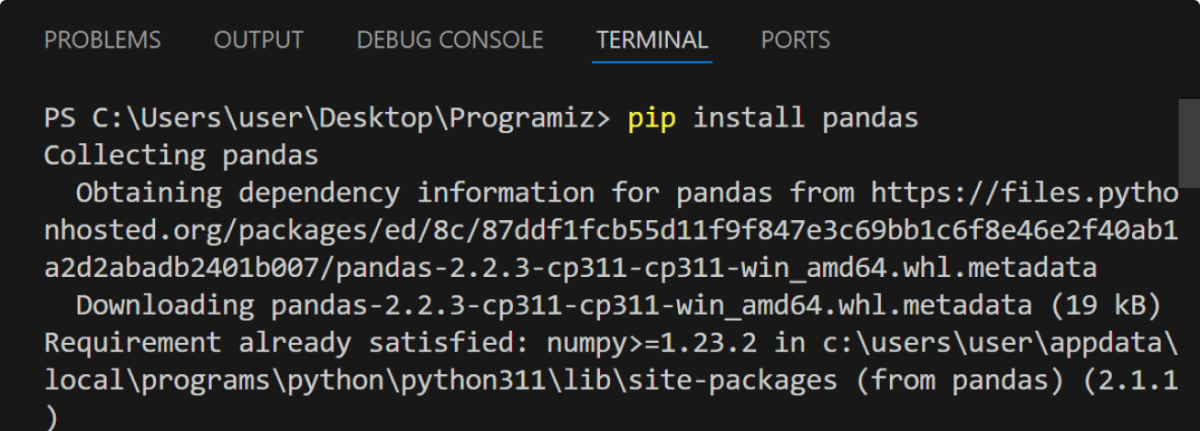
The installation process takes a few moments.
Step 5: Verify the Installation
After installing Pandas, open your terminal or command prompt and run the following command to verify the installation:
python -c "import pandas; print(pandas.__version__)"
Note: The version number might differ from the one above, depending on your installed version.
Now, you can run Python programs using Pandas on your device.
To use Pandas, you must install Python and Pandas on your system. Follow these steps to get started with Pandas on MacOS:
- Install VS Code
- Check the Python Version
- Download the Python Installer File
- Run Python Installer
- Follow the Instructions
- Verify the Python Installation
- Install Pandas
- Verify Pandas Installation
Here is a detailed explanation of each of the steps:
Step 1: Install VS Code
Go to the VS Code official website and download the zipped file. Once the download is complete, open the zipped file.
In Finder, open a new window and navigate to the Applications folder. Drag the VS Code application from the zip file into the Applications folder to install it.
You can now launch VS Code directly from the Applications folder.
Step 2: Check the Python Version
Since macOS often comes with an older version of Python (Python 2.x) pre-installed, you can check the current version using the following command in the Terminal app.
python -- versionOr, for Python 3:
python3 -- versionIf you are satisfied with the installed Python 3.x version, you can skip the remaining steps. Otherwise, follow the steps below.
Step 3: Download the Python Installer File
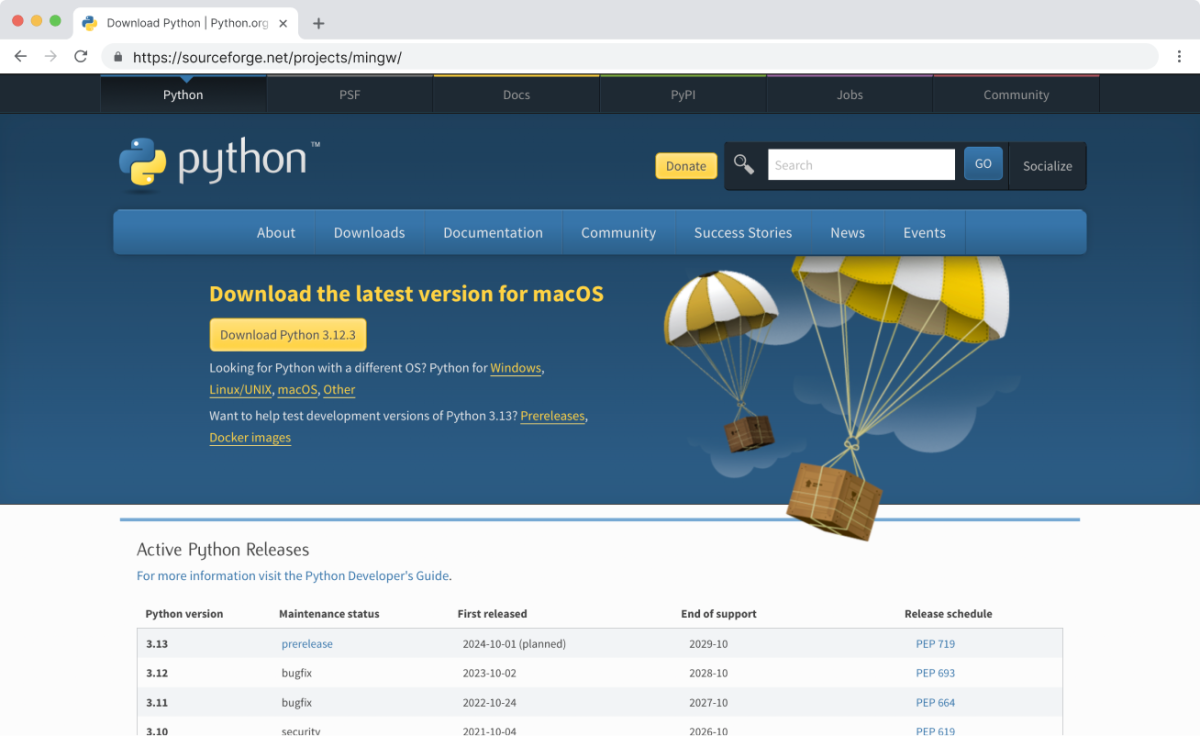
Visit the official Python website and download the latest version (Python 3.12.2 when writing this tutorial) for Mac.
The website automatically detects your operating system and gives you the correct installer.
Step 4: Run the Installer
Go to your downloads folder and run the installer you just downloaded.
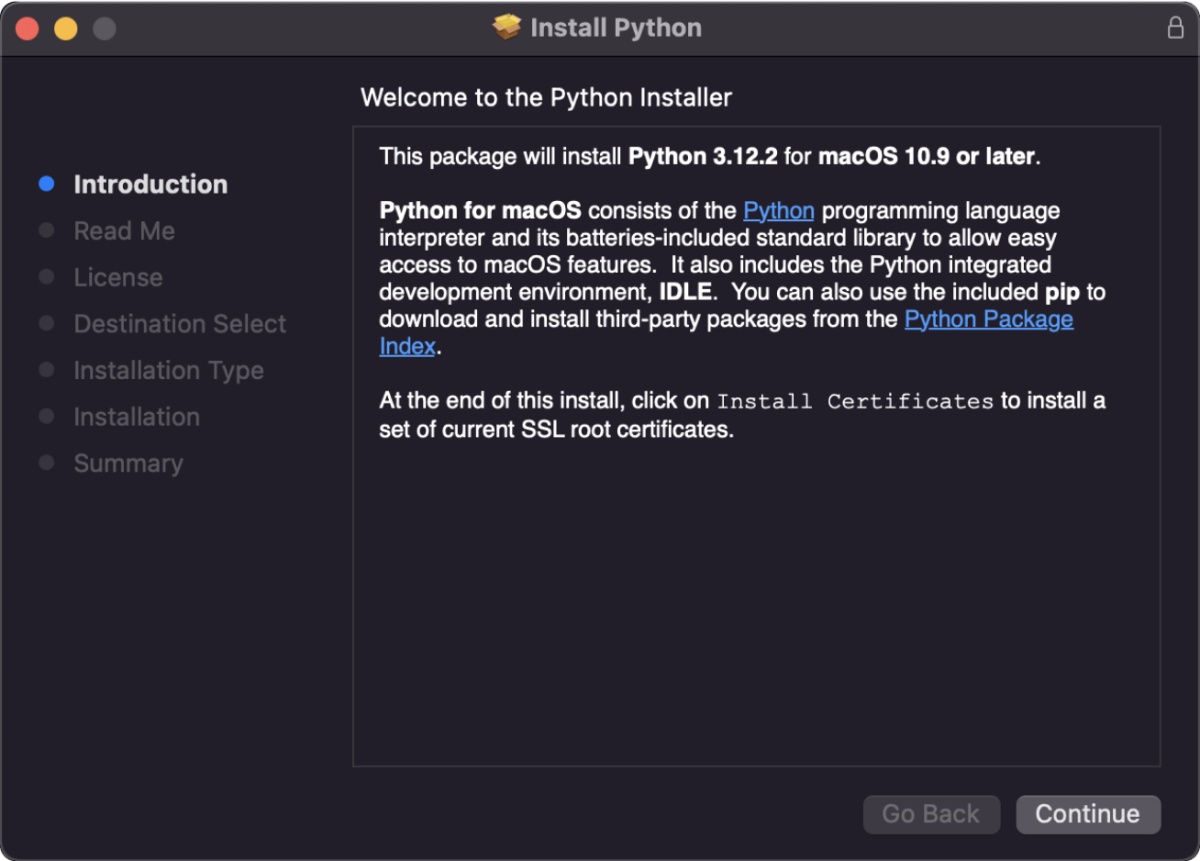
Step 5: Follow the Instructions
You will be prompted to agree to the software license agreement, choose the installation location (we recommend using the default location), and enter your administrator password.
Simply proceed through it.
Once the installation is complete, you will see this screen:
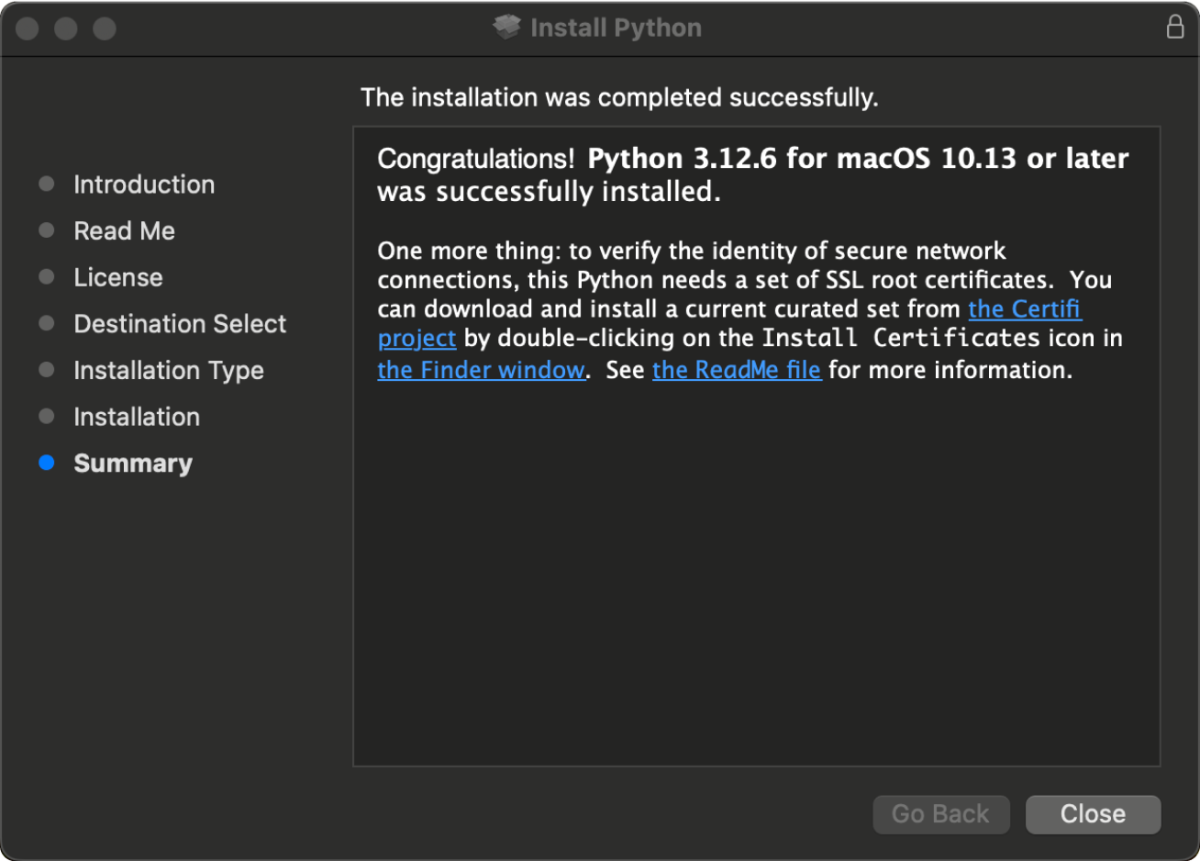
Step 6: Verify the Installation
Once the installation is complete, you can verify whether Python is installed using the following command in the Terminal app.
python3 -- version
Note: The version number might differ from the one above, depending on your installed version.
Now that you have Python installed, you're ready to add any Python libraries you might want to work with. In the next step, we'll install the pandas library.
Step 7: Install Pandas
In the terminal, type the following command to install pandas:
pip3 install pandas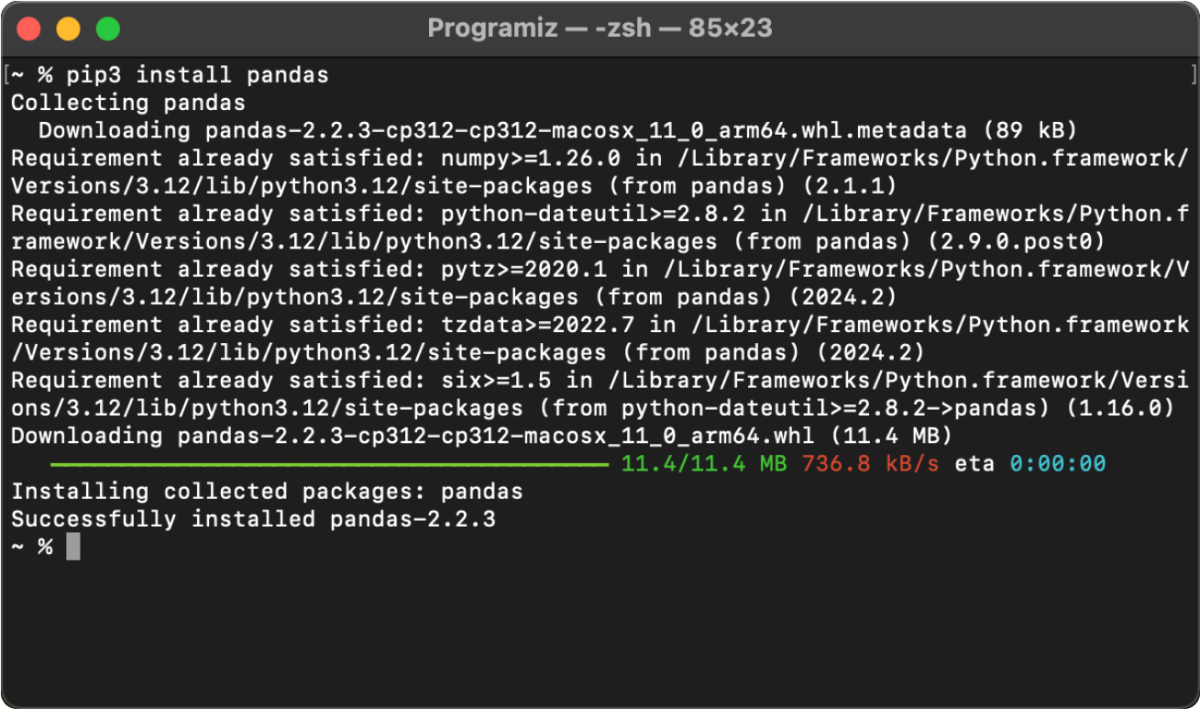
The installation process takes a few moments.
Step 8: Verify Pandas Installation
After installing Pandas, open your terminal and run the following command to verify your installation:
python3 -c "import pandas; print(pandas.__version__)"
Note: The version number might differ from the one above, depending on your installed version.
Now, you can run Python programs using pandas on your device.
Linux has various distributions, and the installation process differs slightly from each other. For now, we will focus on Ubuntu.
To install pandas, follow these steps:
- Install VS Code
- Install Python
- Create a Python Virtual Environment
- Activate the Python Virtual Environment
- Install Pandas
- Verify Pandas Installation
Here is a detailed explanation of each of the steps:
Step 1: Install VS Code
Open the Terminal and type
sudo apt updateThis command updates your package lists to ensure you get the latest versions of your software.
Proceed to install VS Code with
sudo snap install code --classicStep 2: Install Python
Generally, Python is pre-installed on every Linux distribution. However, if that's not the case, you can install Python on your computer.
First, Update the package list to ensure you get the latest version available:
sudo apt updateThen Install Python 3:
sudo apt install python3This command installs Python, Pip, documentation, and other useful packages.

Step 3: Create a Virtual Environment
Before we install Pandas, we'll create a virtual environment.
To do so, move to the desired directory within your computer and run the following command:
python3 -m venv .myenv
Step 4: Activate the Python Virtual Environment
We then need to activate the Python virtual environment, to do so, run the following command:
source .myvenv/bin/activate
After executing the command, restart your computer to ensure the go binary is successfully added to the environment path variable.
Step 5: Install Pandas
Now, we'll use pip to install Pandas.
pip install pandas
Step 6: Verify Pandas Installation
To ensure that the Pandas has been installed correctly, verify the installation by using the following command,
pip show pandas
Now, you can run the Pandas program on your device.
Run Your First Pandas Program
Before you can start working with Pandas, you must have a Python-ready environment. You need to install the Python extension on the VS code to do so.
Open VS Code and click on Extensions on the left sidebar. Then, search for the Python extension by Microsoft and click on Install.
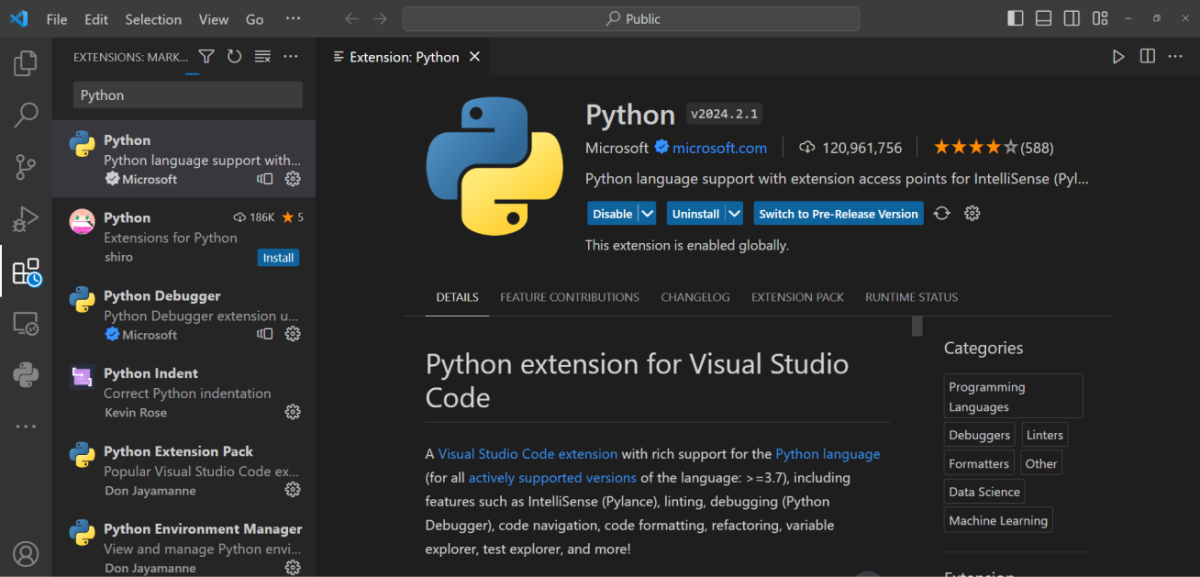
Once the extension is installed, create a new Python file. First, open VS Code, click on the File in the top menu, and then select New File.
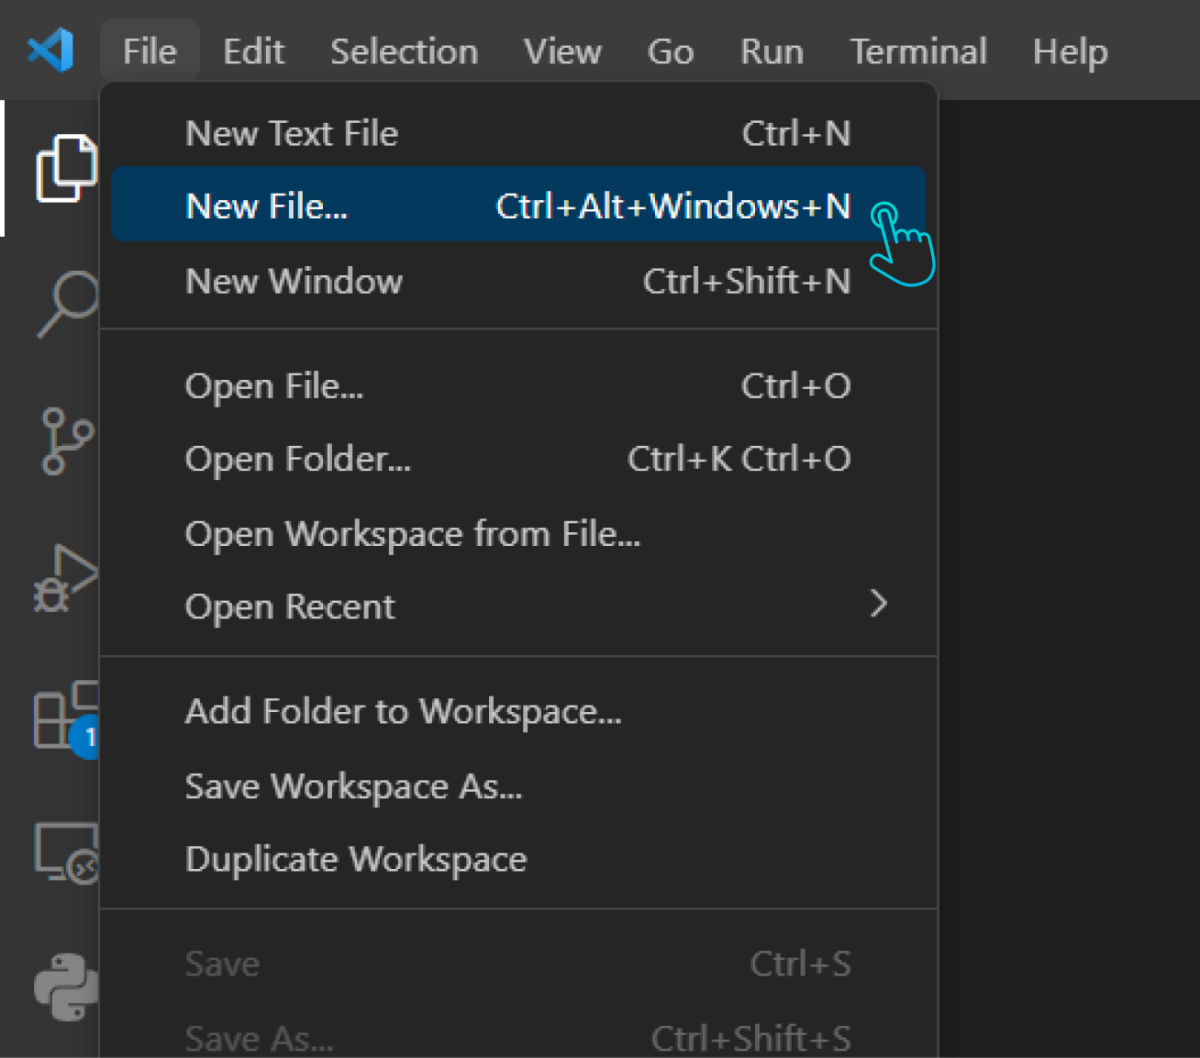
Then, save this file with a
.py
extension by clicking on
File
again, then
Save As, and type your filename ending in
.py. (Here, we are saving it as
create_series.py).
Now, write the following code into your file:
import pandas as pd

# Create a simple Pandas Series
numbers = pd.Series([10, 20, 30, 40, 50])

# Print the Series
print("Pandas Series:")
print(numbers)
The code above creates and displays a Pandas Series (Don't worry if you're unfamiliar with what a Series is—we'll cover that in upcoming lessons).
Then click on the run button on the top right side of your screen.
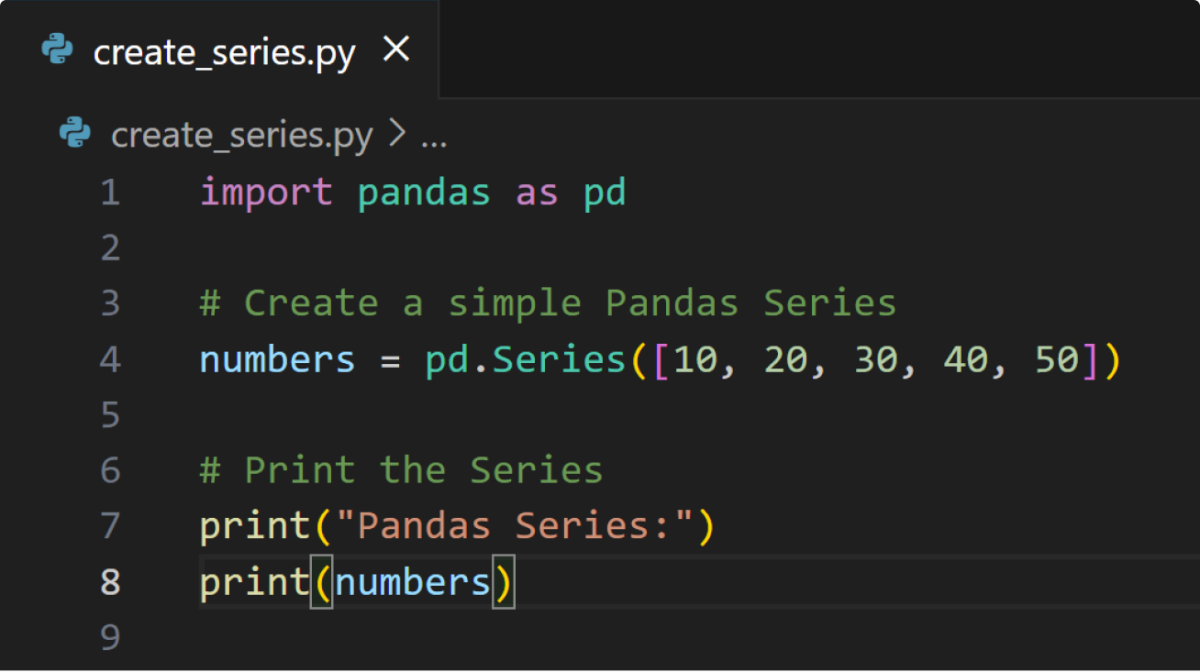
You should see the following output in the terminal.
Pandas Series:
0    10
1    20
2    30
3    40
4    50
dtype: int64
Note: To run the program, you can run the
python create_series.py
command in the VS code terminal.
Now that you have set everything up to run the Pandas program on your computer, you'll learn how the essential program works in Pandas in the following tutorial.